نوشتن با قطرات آب
2. Now we have to make a water drop, for this purpose take new layer and pick Brush tool with Hard edges and make a small drop like show below, (don’t worry about the color).

3. From layer panel write 3% in Fill Opacity. This drop would vanish.
4. Now run the command, Layer >> Layer Style >> Drop Shadow and give the following setting.
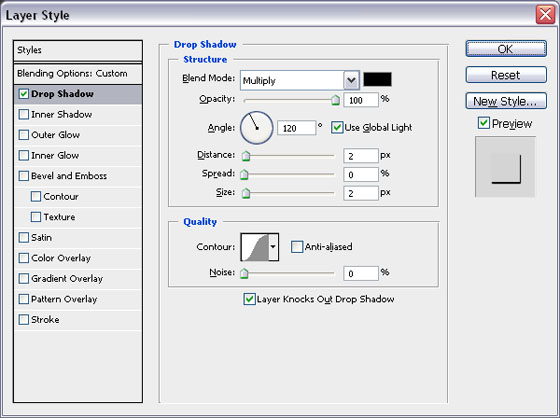
5. Don’t hit ok, click on Inner Shadow and give the following setting:

6. Again don’t hit Ok, just click on Inner Glow and give the following settings:

7. Once again don’t hit ok, just click bevel and emboss and give the following settings:

8. Before hitting the OK button, you have to save these style, for this purpose click on New Style and give it a name, like stunningmesh-water and then hit ok,

you will get the following:

9. Now take a new layer and fill it with White color. Then Pick Horizontal Type tool and write your desire text. While selecting the Text layer press Ctrl+E to merge it with White layer.

10. Now we are going to Roughen the edges, for this purpose run the command, Filter >> Pixelate >> Crystallize and give Cell Size to 10 and hit ok:

You will get something like this:

11. Now run the command Filter >> Blur >> Gaussian blur and give Radius to 5 and hit ok:

12. Now run the command Image >> Adjustment >> levels or just press Ctrl+L and give the following settings:

You will get something like this:

13. Now we are going to remove the white areas, for this, goto Channel Panel (you can open it by running the command Window >> Channel) and from the bottom of this panel click “Load Channel as Selection” icon  , it will select all white area. Press Del key to delete it and press Ctrl+D to unselect and come back to Layer panel again, you will get something like this:
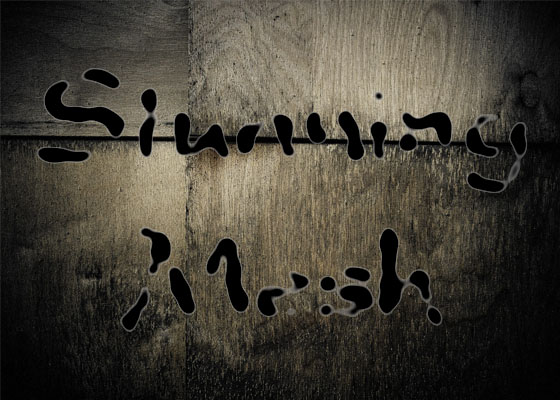
14. Now I’m going to paste the Layer Style which we saved before putting the text. Goto Style Panel and select the last style (stunningmesh-water):
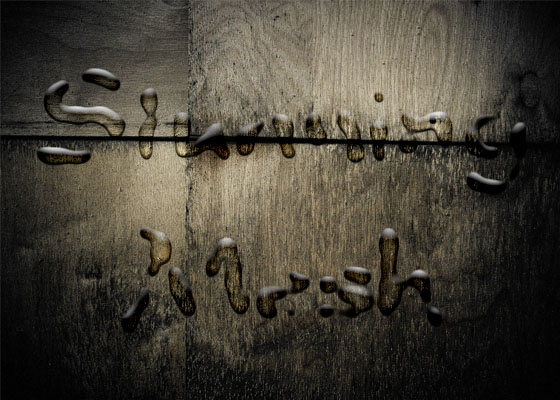
15. You can also add some drops around the text and here it will be the final image:

 بدلیل علاقه به گرافیک از سال 78فتوشاپ کار میکنم